
CSS Fundamentals (1)
CSS Fundamentals (1) - CSS Selectors and Cascading
Basic Selectors
Type(Element) Selector
In html we have tags for each element, type selector selects all the elements with the specific tag:
1 | p { |
Class Selector
In html, we can add class attribute to every element, each element can have multiple classes. The class selector can select elements that have the same class attribute.
1 | .className { |
But sometimes we want to style specific elements that have class applied:
1 | p.className{ |
This styles all p elements that have the class className applied(No spaces between tag name and class name).
1 | .className1.className2 { |
This styles ALL elements that have BOTH className1 and className2 applied.
ID Selector
Usually the id attribute of a element is unique, so we can select the specific element using id selector.
1 | #idName { |
Just like the class selector, we can combine it with tag name to be more specific.(But id selector is already the most specific selector, so this only works for large projects where elements may share unique ids)
1 | p#idName { |
Selector List
Sometimes there are multiple elements that need the same styling, we can style them together using selector list:
1 | p, .className { |
You can either separate them with , or write them on different lines. The first example is the same as:
1 | p { |
Attribute Selector
Sometimes we want to select elements that have specific attribute:
p[attribute] { color: black; }This way we can select those elements with the attribute and have the specific value.1
2
3
4
5
6This selects all `<p>` elements that have the `attribute`, regardless of the value of the attribute.
(*The element can only be tag name, and can be omitted. If omitted, it will select all elements with the attribute*)
* ```CSS
a[href="github.com"] {
color: #3d8fd1;
}p[class~="example"] { color: #3d8fd1; }1
2
3
4
5
6
7
8
9
10
11
12
13
14
15
16This selects all `p` tags that have the attribute class="example". But `~=` means the target elements only need to have the value in its list of values.
There are also attribute selectors for [value substrings](https://developer.mozilla.org/en-US/docs/Learn_web_development/Core/Styling_basics/Attribute_selectors), but they are rarely used.
***
### Pseudo-classes and pseudo-elements selector
In the former selectors, if we want to maintain the site, we inevitably have to edit the HTML, like changing the classes, id or adding attributes. But that is not always available.
Pseudo classes and elements however, only target at HTML elements in a certain state, and they behave as if you had added something to your HTML.
#### User-action pseudo classes
These classes behave like a class has been added to the element when user interact with them. They start with a `:`.
* `:hover`:triggered when user moves their pointer over an element.
* `:focus`: triggered when user click or use `tab` to select and element.
* `:nth-child`: select the n-th child of the element.
Using them we can make a hyperlink change color when user points at it:
```html
<a href="github.com">github link</a>
1 | a:hover { |
pseudo element
This one behaves as if you added a new html element to the page. They start with ::.
::first-line: selects the first line of the element dynamically.::before: add another inline element in front of the father element. Must be accompanied by content.1
2
3a::before {
content: "this is a hyperlink";
}::after: the same as::beforebut added as an immediate child. Must be used withcontent.
Combining pseudo class and elements
We can concatenate pseudo classes without limitation, as long as they don’t contradict with each other:
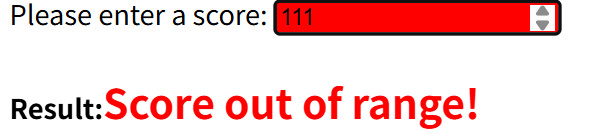
1 | <label for="score">Please enter a score:</label> |
1 | input:focus:out-of-range { |


Now only when user tries to input more than 100 will the background turn red.
However, you cannot do the same with pseudo-elements, they don’t support concatenation.
Still we can concatenate pseudo classes with pseudo-elements, as long as the element appears at last:
1 | input:focus:out-of-range + h4::after { |
Combinator
- Descendent
space:header p {}only selects<p>within<header>.
1
2
3
4
5
6
7<header>
<p>This one is styled</p>
<p>This one is ALSO styled</p>
<div>
<p>This one is ALSO styled</p>
</div>
</header> - Child
>:header > p {}only selects the direct child<p>within<header>
1
2
3
4
5
6
7<header>
<p>This one is styled</p>
<p>This one is ALSO styled</p>
<div>
<p>This one is NOT styled</p>
</div>
</header> - Adjacent sibling
+:header + p {}only selects the first<p>in the<header>
1
2
3
4
5
6
7<header>
<p>This one is styled</p>
<p>This one is NOT styled</p>
<div>
<p>This one is NOT styled</p>
</div>
</header>- Skips if the direct sibling is not the target:
article + p {}
1
2
3
4
5<article>
<a href="example.com">example</a>
<p>target</p>
<!--This p will not be selected-->
</article> - Subsequent-sibling
~:article ~ p {}Selects the siblingpthat is at the same level, unlike the descendent combinator, which targets at all levels:
1
2
3
4
5
6
7<article>
<p>This one is styled</p>
<div>
<p>This one is NOT styled</p>
</div>
<p>This one is ALSO styled</p>
</article>We can combine all former selectors with combinators, so that we can create big CSS selectors that select specific part of the file. But be careful, as doing so may affect the reusability of CSS rules.
ul > li[class="example"]This one uses attribute selector and child combinator to select the direct child(lilist item) ofulthat has classexample
Grouping
We can use , to group selectors together, unlike the combinator, doing so have the same effect as writing them separately.
1 | h1, h2 { |
is the same as:
1 | h1 { |
The universal selector *
* matches all elements. If you use * alone, it targets at everything in your file. But it is usually used with other selectors and combinators:
1 | div * { |
This selects all descendents inside the div.
Inline style
We can write inline styles in HTML file using the attribute style=""
1 | <p style="color: red">Example</p> |
is the same as
1 | p { |
The Cascade
CSS stands for Cascading Style Sheet. When there are multiple rules styling the same element, the cascading algorithm decides which rule is applied.
The general rule is that the last CSS rule in the sheet will be applied, given if they have the same specificity.
Specificity
For a single element: Type(element) selector < class selector < id selector
Inheritance
When you define the properties of the parent element, its child may inherit these properties. Like if you define the font-family of the body, by default every letter in your file will inherit such property and use its value as a default font.
Generally speaking, you can only inherit a property only if :
- The property has no value yet
- The property can be inherited (Usually properties related to font or text can be inherited, like
font-familyorcolor)
However, there are some universal property values we can use to control inheritance:
property=inherit: Enforce inheritance even if the property cannot be inherited.property=initial: Set the value to the initial state (default value).property=unset: If the property can be inherited, it behaves likeinherit, otherwise it behaves likeinitialproperty=revert: Reset to browser’s stylesheet(user-agent stylesheet)
We can use the special property-
allto represent all properties
2
3
all:initial
}This sets all properties of
pto default value.
The Cascading Algorithm
When deciding which CSS rule is applied to a certain element, we use the following principles:
First, consider importance:
1
2
3
p {
color: red ;
}!importanthave the highest level priority.Second, consider specificity:
We can measure the specificity in numbers:Selector Type Example Specificity Value Inline styles style=”color:red” 1000 ID selector #header 100 Class selector .highlight 10 Attribute selector [type=”text”] 10 Pseudo-class :hover 10 Element / type selector div, p, h1 1 Pseudo-element ::before, ::after 1 Universal selector * 0 Combinators div > p, h1 + p 0 :where() (special case) :where(.class) 0 (always zero) Together combined is the specificity value, the larger one wins. Finally, consider source order. That is the one that comes last in the stylesheet wins.